
During active growth
Lawn Leveling and Topdressing: The Complete Guide
High spots can scalp when the mower cuts too low for the terrain. Smoothing small irregularities can help with more even mowing, but a fairway-like result also depends on grass type, mowing equipment and ongoing care. Light topdressing can gradually improve a suitable lawn's surface; the material, depth and recovery conditions matter. Start by distinguishing small bumps from deeper settling or drainage problems.
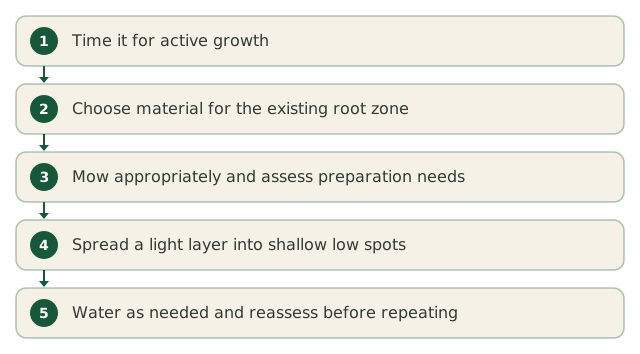
The system, step by step
- Step 1
Time it for active growth
Topdress healthy, actively growing grass with time to recover before growth slows. Warm-season lawns often have suitable conditions in late spring and summer; cool-season lawns may have them in spring or early fall. Use local grass and weather conditions, not the month alone, and postpone work on dormant, slow-growing or stressed turf.
- Step 2
Choose material for the existing root zone
For small surface corrections, match the texture of the existing soil. On clay or loam, choose compatible topsoil unless a turf specialist recommends a managed sand program. Contrasting textures can form layers that impede water movement.
Sand may suit sandy or purpose-built sand root zones; low mowing alone does not establish that suitability. Where sand is appropriate, uniform medium-to-coarse sand is a common choice, but confirm the site's soil, drainage and material analysis with local Extension or a turf specialist; 'masonry', 'play' or 'fine' is not a turf specification. Mature compost can benefit different soil types when its salts, pH and nutrient content suit the site; screening alone does not establish quality. Avoid material containing rocks, debris or weed seed.
Assess why a dip formed before filling it. Some deeper dips can be raised gradually with shallow compatible-soil additions, allowing grass to grow through between passes, potentially over multiple growing periods. For substantial ruts or grade and drainage problems, lifting or removing turf, repairing the underlying soil and replacing or re-establishing the grass may be the better approach.
- Step 3
Mow appropriately and assess preparation needs
Mow at a height appropriate for your grass and its condition without scalping. Core-aerate if compaction or the chosen material's incorporation calls for it; dethatch only if excessive thatch needs attention. Aeration and dethatching are different treatments, not prerequisites for every leveling job. If aeration is appropriate, it can help work material into the soil; the sequence depends on the material and treatment.
- Step 4
Spread a light layer into shallow low spots
Place small amounts and spread the added material with a rake or leveling lute into shallow low areas. Work it into the canopy. About ¼ inch is a starting guide; generally keep a pass at or below ½ inch, and use ¼ inch or less for sand. Use less where the grass height, material or site calls for it. These topdressing depths assume suitable material and healthy, actively growing grass; they are not safe allowances for every lawn.
Allow the grass to grow through and check recovery before another light addition. Choose between gradual filling and the turf-and-soil repair described above based on the dip's cause.
Leave at least half the grass leaf height exposed; shorter grass needs less material. Follow stricter local guidance where applicable — Missouri's cool-season guidance keeps three-quarters of the plant exposed. Excess material can shade, smother or injure turf; leaf exposure and depth alone do not guarantee a suitable pass.
- Step 5
Water as needed and reassess before repeating
If needed to settle and incorporate the material, water lightly, allowing for existing moisture, rain and drainage. Then water according to the lawn's needs. Do not rely on irrigation to correct excess cover. Check actual recovery, remaining unevenness and enough remaining active growth before deciding on another pass. The number of applications and time needed vary with the defect and its cause. Use photos to compare before and after each pass, alongside an on-site check of the grass and surface.
The system that runs it
How YardLedger handles it
Great lawns are logged. YardLedger is the system behind the result: see how it all fits together.
- Project log & photo timeline
- Log each topdressing pass and material, and use the photo timeline to compare the lawn before and after the work. If more passes are needed, that record helps you review what you did; photos alone do not establish recovery or readiness for another application.
Start from a schedule built for your yard
An enthusiast lawn program sits on top of the basics done on time. Enter your grass type and ZIP in the free schedule generator for the month-by-month foundation — no signup required.
Open the schedule generatorA reminder when the season’s next job is due
We'll email you about three weeks before this ZIP's normal first freeze — while irrigation contractors still have slots, and before the backflow preventer is the part that freezes.
The blow-out reminder counts back from your metro's NOAA 1991–2020 median first freeze, not this year's forecast — a normal year, give or take a couple of weeks. Add your address and the reminder follows the live forecast for your own yard, with the checklist built around the zones and shut-offs you've mapped.
Questions on the way there
- When is the best time to level a lawn?
- Level a lawn when the grass is healthy and actively growing, with time to recover before growth slows: often late spring or summer for warm-season grass, and spring or early fall for cool-season grass. Local conditions and the grass's health matter more than a fixed month. Postpone topdressing dormant or stressed turf.
- What sand should I use to level my lawn?
- Leveling material should match the existing soil: on clay or loam, use compatible topsoil unless a turf specialist recommends a managed sand program. Sand may suit sandy or purpose-built sand root zones; low mowing does not establish suitability. Where sand is appropriate, uniform medium-to-coarse sand is a common choice. Confirm soil, drainage and material analysis with local Extension or a turf specialist; a retail name such as 'masonry' or 'play' is not a specification, and contrasting textures can impede water movement. Mature compost can be useful on different soils if its salts, pH and nutrients suit the site; screened does not mean suitable. Depending on the cause, deeper dips may suit gradual shallow compatible-soil additions with growth between passes, or lifting turf and repairing the underlying soil.
- How much can I topdress at once?
- About ¼ inch of topdressing at once is a starting guide; generally keep one pass at or below ½ inch, and use ¼ inch or less for sand. Leave at least half the grass leaf height exposed, following stricter local guidance where applicable; shorter grass needs less. Choose material compatible with the soil, and work only on healthy, actively growing grass with time to recover. These are guidelines, not a universal safe depth: excess cover can injure or smother grass. Dips can sometimes be raised with repeated shallow compatible-soil additions, waiting for growth through and recovery before each pass. This may take multiple growing periods. Substantial ruts or grade and drainage problems may instead need underlying soil repair with turf lifted or replaced.
Where this guidance comes from
The university extension and public-agency publications listed here back specific statements on this page. Each publication says which statement it backs, so you can check the statement rather than take it on trust. Where a product label or your local extension office disagrees with anything here, follow the label or the extension office.
- Lawn Aeration and Topdressing (A3710)
University of Wisconsin–Extension
Topdressing soil should match the existing soil to avoid layering, and at least half the grass leaf height should stay visible after each pass.
- Urban Nutrient Management Handbook (430-350)
Virginia Cooperative Extension
Inorganic topdressing such as sand is kept light, about a quarter inch or less per pass, and works best paired with core aeration.
- Cool-Season Grasses: Lawn Maintenance Calendar (G6705)
University of Missouri Extension
Shallow dips can be raised gradually with thin topdressing passes of roughly ¼–½ inch, using material similar to the existing soil.
